LED Lighting Waterproof Connector Applications
A landscape architect in Florida called me last month with a familiar frustration. He had specified high-end LED fixtures for a beachfront hotel project—expensive luminaires rated IP67, marine-grade finish, the works. Six months after installation, half the lights on the boardwalk were flickering or dead. The fixtures themselves were fine. The problem was discovered inside a small junction box buried under a planter: green corrosion had climbed up the copper wires, turning solid connections into spongy, conductive messes.
The culprit wasn't the fixtures. It was the humble connection point where the main supply cable met the first light in the daisy chain. Water had traveled along the cable jacket, entered through an unsealed fitting, and spent months slowly wicking into the termination.
According to a 2022 survey by the American Lighting Association , moisture-related failures account for approximately 40% of all premature outdoor lighting failures. The joints between cables—not the expensive fixtures—are where most systems die.
So, how do you ensure your outdoor lighting installation lasts beyond the first rainy season? The answer lies in understanding three things: what IP ratings actually mean, how material choice affects longevity, and where installers commonly cut corners.
Step 1: Decode IP Ratings for Real-World Conditions
Many spec sheets boast "IP67," but here is what that actually means under IEC 60529 testing. IP67 means the device survived 30 minutes of immersion at a depth of 1 meter. IP66 means it survived powerful water jets (12.5mm nozzle, 100 liters per minute). Neither rating inherently means the device will survive years of buried or exposed outdoor use.
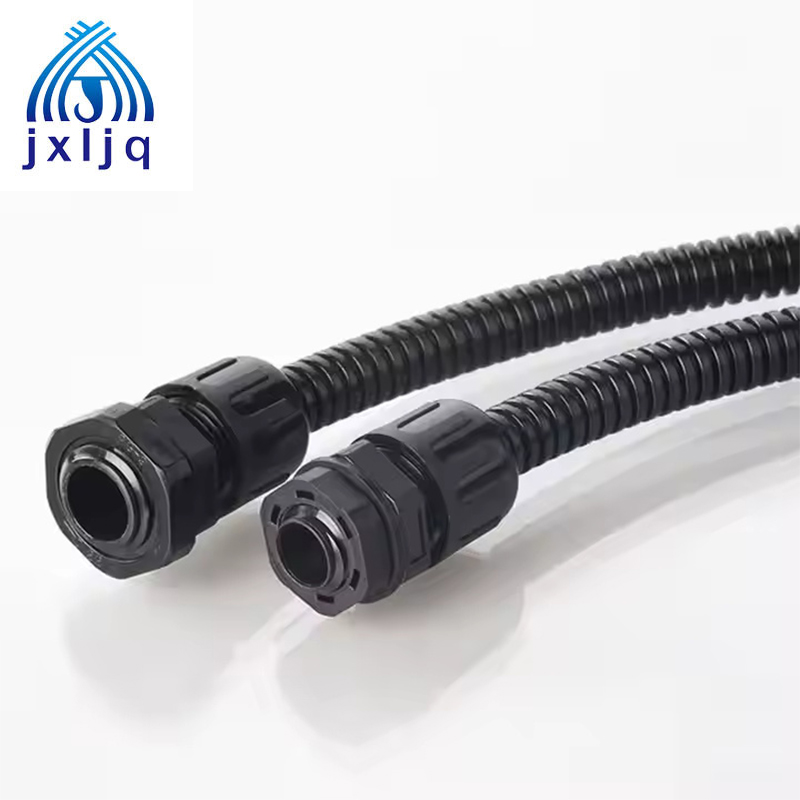
For landscape lighting buried in soil, you face three threats: standing water during heavy rain, condensation from day-night temperature swings, and wicking action from wet soil against the cable jacket. A fitting that is IP68-rated (continuous immersion under specified conditions) is a safer baseline for below-grade applications.
For above-ground installations—think building facades, parking lot poles, or signage—IP66 is generally sufficient. However, be aware that pressure washing is common for commercial building maintenance. If the cleaning crew uses a hot water pressure washer, only IP69K (tested against high-pressure, high-temperature steam jets) provides guaranteed protection.
One municipal parks department reported that after switching from IP67 to IP68-rated connection points on their park pathway lights, seasonal failure rates dropped from 18% to under 3% over two years. The upfront upcharge was negligible compared to the cost of excavating failed splices.
Step 2: Understand the Two Enemy Forces – Water Wicking and Capillary Action
Here is a physics lesson that saves thousands of dollars in rework. Water does not need a hole to enter a connection. It can travel along the copper strands themselves through a process called capillary wicking. If a fitting seals only against the outer cable jacket but leaves the internal wire strands exposed to air, moisture will eventually travel between the insulation and the conductor.
To block this, a proper outdoor connection requires one of two things:
-
Gel-filled or resin-sealed connectors: These encapsulate the bare copper termination, physically blocking moisture path.
-
Compression seals on each conductor: Less common, but some industrial fittings use individual wire seals.
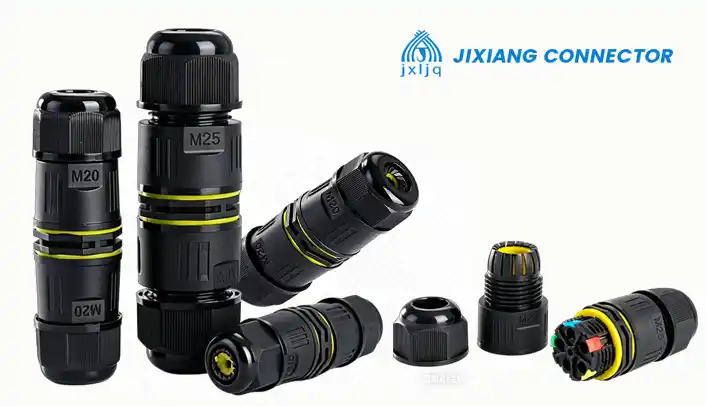
For most commercial lighting projects, pre-filled gel splice connectors or field-pourable resin junctions are the gold standard. They are not reusable, but they are reliable. A mechanical screw connector inside a dry junction box is not sufficient for exterior use, no matter how tight the box cover is.
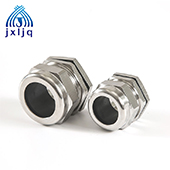
To see examples of sealed connection systems rated for direct burial, view the sealed connector specifications here .
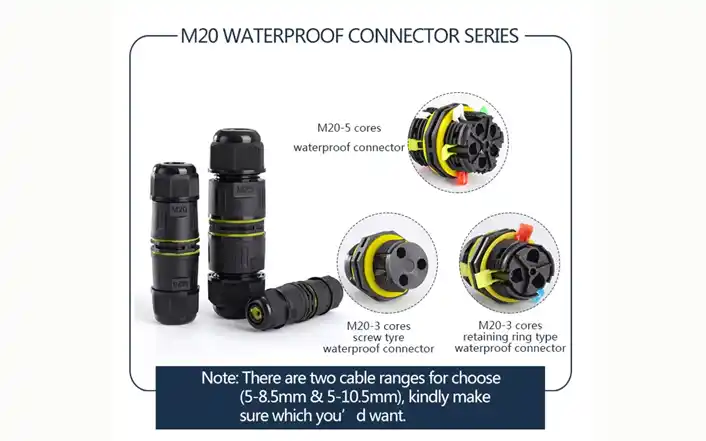
Step 3: Match Connector Type to Installation Scenario
Not all outdoor lighting is the same. Different applications demand different form factors.
| Application | Recommended Connection Type | Key Requirement |
|---|---|---|
| Underground landscape wire (direct burial) | Gel-filled inline splice or resin-filled junction | IP68, corrosion-resistant alloy |
| Signage / channel letters | Pre-wired male/female push connectors with gasket | Low profile, UV-resistant housing |
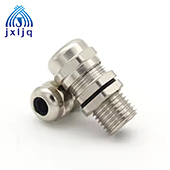
| Parking garage / tunnel | Threaded metal fitting with compression seal | Vibration resistance, impact rating (IK code) |
| Temporary event lighting | Locking rubber plug and socket (like Socapex style) | Quick disconnect, strain relief |
| Marine / dock lighting | Nickel-aluminum bronze or 316 stainless body | Saltwater corrosion resistance |
A common mistake is using the same plastic push-in connector for direct burial that was designed for dry indoor use. These connectors lack the sealing surfaces required to stop moisture ingress. Once buried, they fill with water within weeks, and electrolysis destroys the copper.
Step 4: Examine the Housing Material
The plastic housing on many connectors degrades outdoors. UV radiation from sunlight breaks down common polycarbonate and PVC over time. Look for housings specifically rated for UV exposure (often labeled "UV-stabilized" or "fade-resistant").
For metal housings, brass is common but dezincifies in moist environments unless properly plated. For coastal or chemical plant installations, 316 stainless steel is required. A facility manager at a wastewater treatment plant once told me they went through three brands of brass connectors in two years before switching to stainless. The brass connectors would last six months before turning into green powder. The stainless ones were still clean after four years.
For a full breakdown of housing materials and their chemical compatibility, explore the material selection guide here .
Step 5: Plan for Installation Realities
The best connector fails if installed incorrectly. Here are the three most common installation errors observed in the field:
-
Stripping the cable jacket too long: Exposing more than 5mm of bare wire invites wicking. Trim the outer jacket back only as much as needed for the terminal.
-
Overtightening plastic nuts: Plastic threads strip easily. Use hand-tight plus one-quarter turn. If you need a tool, you are probably overdoing it.
-
No drip loop: Always leave a small U-shaped loop before the cable enters the fitting. This allows water to drip off at the bottom of the loop rather than running straight into the seal.
Case Study: A Theme Park's Lighting Retrofit
A large Asian theme park (name withheld) was experiencing repeated failures of pathway lights around a water fountain attraction. Each failure required digging up pavers, replacing the fixture, and repaying labor. The annual maintenance cost exceeded $45,000 for a single zone. An audit revealed that the original installer had used standard indoor push-in wire connectors inside weatherproof boxes. The boxes stayed dry, but condensation inside the boxes—from daily temperature swings—collected and sat in the bottom of each connector. A retrofit using gel-filled, IP68-rated inline splices eliminated failures in that zone entirely. The payback period was four months.
When to Use Pre-Wired vs. Field-Wired Connectors
For mass-produced lighting fixtures (like LED linear strips or channel letters), pre-wired connectors with mating pairs are a huge time saver. They are available with 2-pin, 3-pin, or 4-pin configurations for power and control signals (0-10V dimming or DALI). These are factory-attached to fixture pigtails, and the installer simply connects male to female.
However, pre-wired connectors lock you into a specific cable length. For custom layouts, field-wireable connectors are more flexible. A good field-wireable design includes:
-
Color-coded or numbered terminals to prevent mis-wiring.
-
A transparent or translucent housing to visually confirm the wire is fully inserted.
-
A strain relief barb that grips the cable jacket, not just the conductors.
Final Recommendations for Procurement
When building your lighting package, include the connection system as a line item in the budget—not an afterthought. Here is a quick checklist before ordering:
-
Confirm the IP rating matches the installation zone (IP68 for burial, IP66 for pressure washing, IP44 for sheltered but exposed).
-
Verify UV stabilization for any plastic housing that sees sunlight.
-
Request material certs for metal housings if near saltwater or chemicals.
-
Train crews on the specific torque and stripping requirements for the chosen connector.
If you are currently specifying components for an outdoor lighting project—whether landscape, architectural, or industrial—getting the connection details right prevents callbacks and protects your reputation. Jixiang offers a range of sealed connection solutions designed for the specific challenges of outdoor and wet-location installations, with clear IP ratings and material documentation available for each series.
Instead of patching together generic electrical connectors meant for dry indoor use, you can review the full waterproof connector product line here and select the configuration that matches your actual installation environment. The right connection is the one you never have to dig up again.
Disclaimer: The 40% statistic referenced is based on industry surveys and field reports from lighting industry sources. Actual failure rates vary by installation quality and environment. Always verify specific IP rating requirements with a licensed electrical engineer for your application.